We will render a Triangle and perform a rotation on it while rendering.
Triangle Source Code
using System;
using System.Collections.Generic;
using System.Linq;
using System.Text;
using SlimDX.D3DCompiler;
using SlimDX;
using SlimDX.Direct3D11;
using SlimDX.DXGI;

namespace Apparat.Renderables
{
    public class TriangleCB : Renderable
    {
        ShaderSignature inputSignature;
        VertexShader vertexShader;
        PixelShader pixelShader;

        InputLayout layout;
        SlimDX.Direct3D11.Buffer vertexBuffer;

        public TriangleCB()
        {

            #region shader and triangle

            try
            {
                // load and compile the vertex shader
                using (var bytecode = ShaderBytecode.CompileFromFile("transform.fx", "VShader", "vs_4_0", ShaderFlags.None, EffectFlags.None))
                {
                    inputSignature = ShaderSignature.GetInputSignature(bytecode);
                    vertexShader = new VertexShader(DeviceManager.Instance.device, bytecode);
                }
            }
            catch (Exception ex)
            {
                Console.WriteLine(ex.ToString());
            }

            // load and compile the pixel shader
            using (var bytecode = ShaderBytecode.CompileFromFile("transform.fx", "PShader", "ps_4_0", ShaderFlags.None, EffectFlags.None))
            {
                pixelShader = new PixelShader(DeviceManager.Instance.device, bytecode);
            }

            // create test vertex data, making sure to rewind the stream afterward
            var vertices = new DataStream(12 * 3, true, true);
            vertices.Write(new Vector3(0.0f, 0.5f, 0.5f));
            vertices.Write(new Vector3(0.5f, -0.5f, 0.5f));
            vertices.Write(new Vector3(-0.5f, -0.5f, 0.5f));
            vertices.Position = 0;

            // create the vertex layout and buffer
            var elements = new[] { new InputElement("POSITION", 0, Format.R32G32B32_Float, 0) };
            layout = new InputLayout(DeviceManager.Instance.device, inputSignature, elements);
            vertexBuffer = new SlimDX.Direct3D11.Buffer(
                DeviceManager.Instance.device,
                vertices,
                12 * 3,
                ResourceUsage.Default,
                BindFlags.VertexBuffer,
                CpuAccessFlags.None,
                ResourceOptionFlags.None,
                0);
            #endregion
        }

        public override void dispose()
        {
            pixelShader.Dispose();
            vertexShader.Dispose();
            inputSignature.Dispose();
        }

        float rot = 0.0f;
        Matrix rotMat;

        public override void render()
        {
            rot += 0.01f;
            rotMat = Matrix.RotationY(rot);

            var matStream = new DataStream(64, true, true);
            matStream.Write(rotMat);
            matStream.Position = 0;

            using (SlimDX.Direct3D11.Buffer matBuffer = new SlimDX.Direct3D11.Buffer(DeviceManager.Instance.device,     //Device
                                                             matStream, //Stream
                                                             64,         // Size
                                                                // Flags
                                                             ResourceUsage.Dynamic,
                                                             BindFlags.ConstantBuffer,
                                                             CpuAccessFlags.Write,
                                                             ResourceOptionFlags.None,
                                                             4))
            {
                DeviceManager.Instance.context.VertexShader.SetConstantBuffer(matBuffer, 0);
            }


            // configure the Input Assembler portion of the pipeline with the vertex data
            DeviceManager.Instance.context.InputAssembler.InputLayout = layout;
            DeviceManager.Instance.context.InputAssembler.PrimitiveTopology = PrimitiveTopology.TriangleList;
            DeviceManager.Instance.context.InputAssembler.SetVertexBuffers(0, new VertexBufferBinding(vertexBuffer, 12, 0));

            //// set the shaders
            DeviceManager.Instance.context.VertexShader.Set(vertexShader);
            DeviceManager.Instance.context.PixelShader.Set(pixelShader);

            // render the triangle
            DeviceManager.Instance.context.Draw(3, 0);
        }


    }
}
Shader Source Code
cbuffer ConstBuffer : register(c0)
{
 float4x4 gWVP;
}

float4 VShader(float4 position : POSITION) : SV_POSITION
{
 return mul( position, gWVP);
}

float4 PShader(float4 position : SV_POSITION) : SV_Target
{
 return float4(1.0f, 0.0f, 0.0f, 1.0f);
}
Explanation of the Shader Source Code
In order to set transformations, we need to have a variable in the Shader to assign the transformation.
In this shader I call the variable gWVP and it is declared in the ConstantBuffer:
cbuffer ConstBuffer : register(c0)
{
 float4x4 gWVP;
}
To apply the transformation to each vertex of our triangle, we have to apply a Multiplication with
the Transformation Matrix.
float4 VShader(float4 position : POSITION) : SV_POSITION
{
 return mul( position, gWVP);
}
Explanation of the Triangle Source Code
If you compare the Constructor of the TriangleCB class above with the Constructor of the Triangle class
in the "Rendering a Triangle" Tutorial, everything remains the same:
We create a VertexShader, a Pixel Shader, we write the Vertices of the Triangle to a DataStream and create a VertexBuffer.
I added two Variables for the rotation of the Triangle and a Matrix to hold the Transformation Matrix:
float rot = 0.0f;
Matrix rotMat;
The interesting part happens in the render Function of our Triangle. Let's have a short look at our original Version of our Triangle:
public override void render()
{
  // configure the Input Assembler portion of the pipeline with the vertex data
  DeviceManager.Instance.context.InputAssembler.InputLayout = layout;
  DeviceManager.Instance.context.InputAssembler.PrimitiveTopology = PrimitiveTopology.TriangleList;
  DeviceManager.Instance.context.InputAssembler.SetVertexBuffers(0, new VertexBufferBinding(vertexBuffer, 12, 0));

  // set the shaders
  DeviceManager.Instance.context.VertexShader.Set(vertexShader);
  DeviceManager.Instance.context.PixelShader.Set(pixelShader);

  // render the triangle
  DeviceManager.Instance.context.Draw(3, 0);
}
The Input Assembler Stage is set with an InputLayout, we provide a Primitive Topology and the Vertex Buffer is set. The Vertex and Pixel Shader are set in the Device and we can finally draw the Triangle.
Our new render function looks like this:
public override void render()
{
  rot += 0.01f;
  rotMat = Matrix.RotationY(rot);

  var matStream = new DataStream(64, true, true);
  matStream.Write(rotMat);
  matStream.Position = 0;

  using (SlimDX.Direct3D11.Buffer matBuffer = new SlimDX.Direct3D11.Buffer(
    DeviceManager.Instance.device,     //Device
    matStream, //Stream
    64,         // Size
    // Flags
    ResourceUsage.Dynamic,
    BindFlags.ConstantBuffer,
    CpuAccessFlags.Write,
    ResourceOptionFlags.None,
    4)){             DeviceManager.Instance.context.VertexShader.SetConstantBuffer(matBuffer, 0);
  }

  // configure the Input Assembler portion of the pipeline with the vertex data
  DeviceManager.Instance.context.InputAssembler.InputLayout = layout;
  DeviceManager.Instance.context.InputAssembler.PrimitiveTopology = PrimitiveTopology.TriangleList;
  DeviceManager.Instance.context.InputAssembler.SetVertexBuffers(0, new VertexBufferBinding(vertexBuffer, 12, 0));

  // set the shaders
  DeviceManager.Instance.context.VertexShader.Set(vertexShader);
  DeviceManager.Instance.context.PixelShader.Set(pixelShader);

  // render the triangle
  DeviceManager.Instance.context.Draw(3, 0);
}
The lower part of the Source Code is exactly the same. In the upper part I add 0.01f of rotation in every frame. Then this rotation value is used to create a Rotation Matrix, that performs a Rotation around the Y-Axis:
rot += 0.01f;
rotMat = Matrix.RotationY(rot);
Next I create a DataStream, to write the Rotation Matrix to:
var matStream = new DataStream(64, true, true);
matStream.Write(rotMat);
matStream.Position = 0;
The SlimDX DataStream Class has the following Constructor:
public DataStream(long sizeInBytes, bool canRead, bool canWrite);
So when creating the DataStream the Size of the Matrix in Bytes has to be given as a Parameter.
A Matrix is a struct with 4x4 float, a float consists of 4 Bytes, so the Matrix struct has the size of 64 Bytes, thus we have to create the DataStream with a size of 64 Bytes. And we assign the Matrix rotMat by writing it to the stream. Finally we have to rewind the Stream by setting its Position to 0.
Finally we have to assign the Transformation Matrix to the VertexShader:
using (SlimDX.Direct3D11.Buffer matBuffer = new SlimDX.Direct3D11.Buffer(DeviceManager.Instance.device, //Device
  matStream, //Stream
  64,        // Size
  // Flags
  ResourceUsage.Dynamic,
  BindFlags.ConstantBuffer,
  CpuAccessFlags.Write,
  ResourceOptionFlags.None,
  4))
{
  DeviceManager.Instance.context.VertexShader.SetConstantBuffer(matBuffer, 0);
}
This is done by creating a Buffer that holds the DataStream with the Data of the Rotation Matrix. Then we use this Buffer to set the ConstantBuffer of the VertexShader.
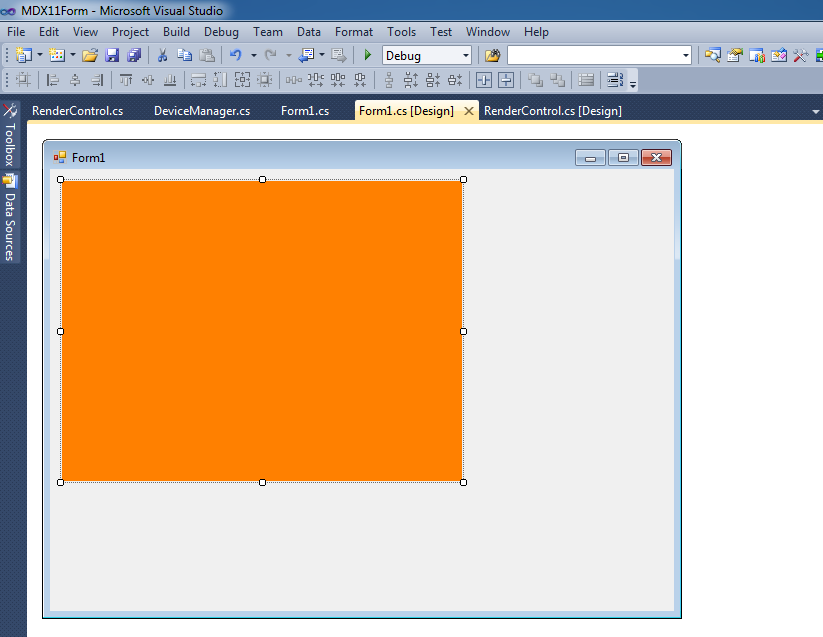
When Creating the Triangle, adding it to the Scene and let the Program run, you a get a rotating red Triangle:

You can download the Project here:
http://apparat.codeplex.com/SourceControl/changeset/9d048db48302